Author: Melanie Price

8 Creative Techniques for Filming Interviews That Stand Out

Interviews are more than just conversations. They are an opportunity to connect with your audience on a deeper level, conveying emotions, stories, and insights in a compelling way. Whether you’re a seasoned filmmaker or a novice videographer, employing creative techniques can elevate your interviews from ordinary to extraordinary. Here are eight inventive approaches to make your filmed interviews stand out.

1. Playing with Angles and Perspectives

The traditional head-on shot has its place, but experimenting with different angles and perspectives can add depth and interest to your interviews. Try shooting from a lower angle to give your subject a more commanding presence, or use a high angle for a more vulnerable look. Incorporating unconventional perspectives, such as a bird’s-eye view or a profile shot, can also add a fresh dynamic to the conversation.

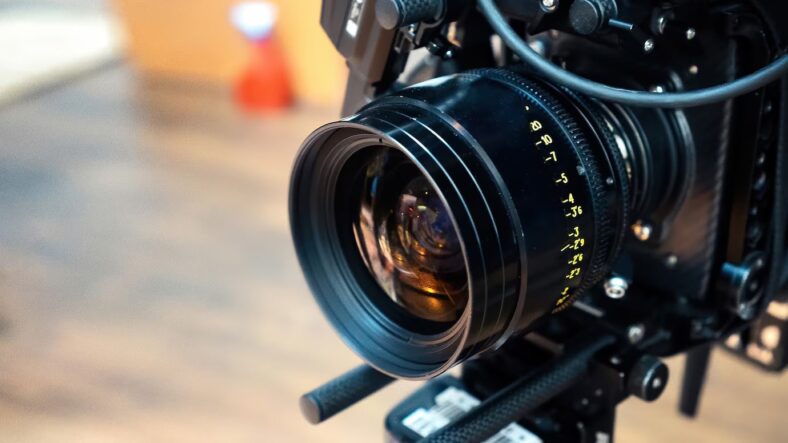
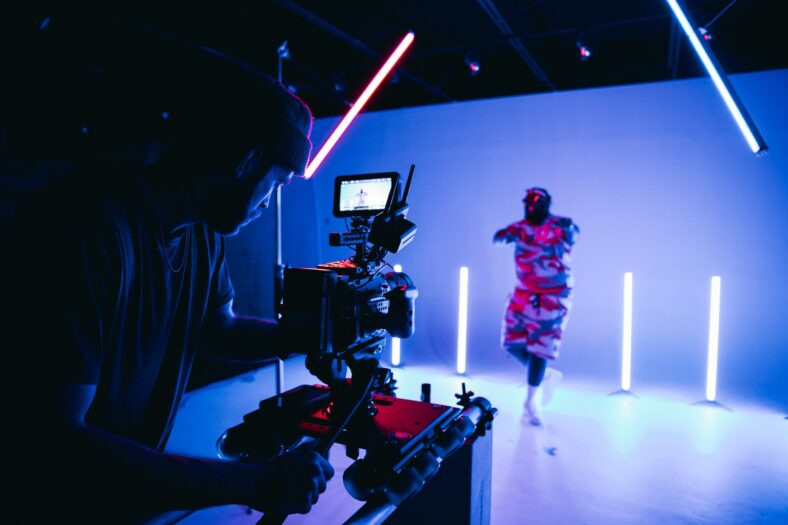
2. Creative Lighting Techniques

Lighting can dramatically alter the mood and tone of your interview. Instead of relying on standard three-point lighting, consider using natural light to create a softer, more authentic feel. Alternatively, playing with shadows or using colored lighting can evoke certain emotions or underscore the theme of your interview. Remember, the way you light your subject can say just as much as the words they speak.

3. Incorporating Movement

Static shots can sometimes feel stagnant. By introducing movement, you create a more engaging viewing experience. This can be as simple as handheld shots to add a sense of immediacy or using sliders and gimbals for smooth motion. Even subtle movements, like a slow zoom or a gentle pan, can draw viewers in and emphasize important moments.

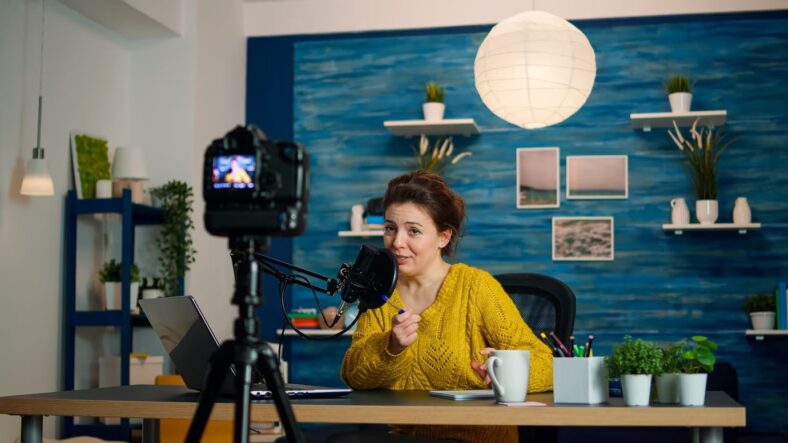
4. Dynamic Backgrounds and Locations

The setting of your interview can greatly influence its impact. Instead of static backdrops, consider filming in dynamic locations that relate to your subject’s story or expertise. This could be outdoors in a meaningful setting, amidst action relevant to the topic, or in a place that visually represents the theme of the interview. A well-chosen location can add a whole new layer of meaning and engagement.

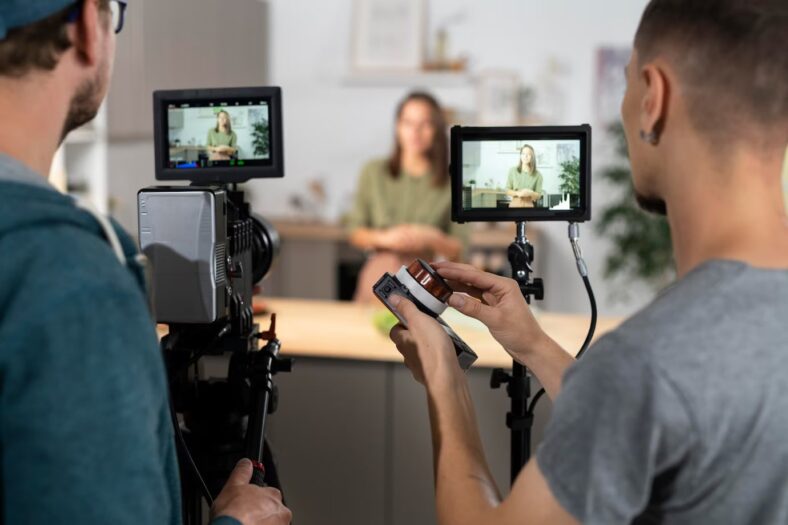
5. Multi-Camera Setups

Using multiple cameras allows you to capture various angles simultaneously, making your interview more dynamic and visually interesting. This approach enables you to switch between wide shots, close-ups, and reaction shots without interrupting the flow of the interview. It also offers greater flexibility in post-production, allowing you to choose the most impactful shots.

6. Engaging with the Environment

Encourage your subjects to interact with their surroundings. This can help to reveal their personality and make the interview feel more natural and relaxed. Whether it’s walking through a location, showing objects of personal significance, or performing a task related to their expertise, this technique helps to tell a richer story beyond the conversation.

7. Creative Post-Production Effects

In post-production, there’s a wealth of creative effects at your disposal to enhance your interview. This could range from interesting transitions, color grading to set the tone, to incorporating graphics or animations that complement the dialogue. Use these tools judanly to add to the storytelling without overwhelming the content.

8. Innovative Audio Techniques

Audio is just as crucial as visuals. Incorporating ambient sounds from the interview’s location can add atmosphere and context. Music can also play a powerful role in setting the tone and pace of the interview. Experimenting with the audio landscape can make your interview more immersive and emotionally resonant.

Breath Life into Your Interviews

Employing these eight creative techniques can transform your interviews into compelling visual narratives that captivate your audience. Remember, the goal is to enhance the storytelling aspect of your interviews, bringing out the personality of your subjects, and engaging your viewers on a deeper level. With some creativity and experimentation, you can turn ordinary interviews into unforgettable stories that resonate long after the screen fades to black.

8 Tips for Seamless Broadcasts in Live Streaming

Live streaming has emerged as a powerful tool for individuals and businesses alike to connect with audiences in real-time. Whether you’re a content creator, a marketer, or an entrepreneur, mastering the art of live streaming can elevate your brand and engage your audience like never before. However, the world of live streaming can be daunting, with technical challenges and unexpected hiccups often standing in the way of a seamless broadcast. 

1. Invest in Quality Equipment

The foundation of a successful live stream begins with quality equipment. Invest in a reliable camera, microphone, and lighting setup to ensure clear video and audio quality. While you don’t need to break the bank, investing in equipment that suits your streaming needs can make a world of difference in the professionalism and production value of your broadcasts.

2. Stable Internet Connection

A stable internet connection is crucial for a seamless live stream. Before going live, conduct a speed test to ensure your upload speed can handle the bandwidth requirements of your stream. Consider using a wired connection instead of Wi-Fi for added stability, especially if you’re streaming from a location with poor signal strength.

3. Plan and Prepare

Preparation is key to a successful live stream. Create a detailed script or outline of your broadcast, including key talking points, transitions, and any visual elements you plan to incorporate. Rehearse your content beforehand to familiarize yourself with the flow of the broadcast and anticipate potential challenges.

4. Engage with Your Audience

One of the greatest advantages of live streaming is the ability to interact with your audience in real-time. Encourage viewers to engage with your content by asking questions, responding to comments, and incorporating interactive polls or Q&A sessions into your broadcast. Building a sense of community can enhance viewer retention and loyalty to your brand.

5. Test Your Setup

Before going live, conduct thorough testing of your streaming setup to identify and address any potential issues. Test your equipment, internet connection, and streaming platform to ensure everything is functioning as expected. Consider running a test stream on a private channel to troubleshoot any technical issues without impacting your live audience.

6. Optimize Audio and Video Settings

Pay close attention to your audio and video settings to ensure optimal quality during your live stream. Adjust camera settings such as resolution, frame rate, and exposure to achieve the best possible image quality. Similarly, optimize microphone settings to minimize background noise and ensure clear, crisp audio.

7. Promote Your Stream

Building an audience for your live stream requires effective promotion and marketing. Utilize social media platforms, email newsletters, and other marketing channels to promote your upcoming broadcasts and generate excitement among your audience. Consider collaborating with influencers or partnering with other brands to reach a wider audience.

8. Monitor and Analyze Performance

Once your live stream is complete, take the time to analyze its performance and gather valuable insights. Monitor metrics such as viewer count, engagement rate, and viewer retention to gauge the effectiveness of your broadcast. Use this data to refine your future live streaming strategies and optimize your content for maximum impact.

Conclusion

Navigating the world of live streaming requires careful planning, preparation, and execution. By following all these tips, you can create seamless and successful live broadcasts that captivate viewers and elevate your brand. Harness the power of live streaming and connect with your audience in meaningful and impactful ways.

Exploring the Magic of Slow Motion: Tips for Captivating Footage

The magic of slow-motion footage has the power to captivate audiences and elevate storytelling to new heights. Whether it’s capturing the grace of a dancer’s movement or the subtle details of a fleeting moment, slow motion adds a layer of cinematic enchantment that transcends traditional filmmaking. In this exploration of the art and science behind slow-motion footage, we will unravel the tips and techniques to create truly mesmerizing visuals.

1. Choose the Right Frame Rate:

Selecting the appropriate frame rate is crucial for achieving the desired effect. Higher frame rates, such as 120 fps or 240 fps, allow for ultra-smooth slow-motion sequences. However, the ideal frame rate depends on the specific action you’re capturing. Experiment with different frame rates to find the sweet spot for your subject, ensuring a balance between fluidity and dramatic effect.

2. Lighting is Key

Proper lighting is essential for any video production, but it becomes even more critical in slow-motion shooting. Slowing down the frame rate reduces the amount of light hitting the sensor, potentially resulting in underexposed footage. Make sure to have sufficient lighting to maintain clarity and detail in your slow-motion shots. Consider using external lights or shooting during the golden hours for natural, soft lighting.

3. Embrace Movement and Fluidity

Slow motion is perfect for emphasizing the fluidity of motion. Experiment with dynamic subjects like flowing water, billowing fabrics, or even hair in motion. The slowed-down pace allows viewers to appreciate the subtle beauty of these elements, turning mundane scenes into visually stunning compositions.

4. Focus on Storytelling

While slow motion can be visually captivating on its own, it becomes truly powerful when integrated seamlessly into the narrative. Use slow motion to highlight key moments in your story, evoking emotions and creating a lasting impact on the audience. Consider the emotional resonance of each shot and how it contributes to the overall storytelling experience.

5. Smooth Transitions

Incorporate smooth transitions between regular-speed footage and slow-motion sequences to create a seamless flow. This technique adds a layer of sophistication to your video and prevents abrupt shifts that may distract the viewer.

6. Experiment with Speed Ramping

Speed ramping involves gradually changing the speed of your slow-motion footage within a single shot. This technique adds a dynamic element to your visuals, enhancing the overall impact. Use speed ramping judiciously to draw attention to specific actions or moments.

Conclusion

Mastering the magic of slow motion opens up a realm of creative possibilities in videography. By understanding the technical aspects, embracing creative composition, and enhancing your footage in post-production, you can create captivating visuals that leave a lasting impression on your audience. So, grab your camera, experiment with frame rates, and let the enchantment of slow motion transform your filmmaking journey.

Essential Lighting Techniques for Quality Video Production

Lighting is a fundamental aspect of video production that can make or break the quality of your final product. Whether you’re shooting interviews, creating narrative films, or producing commercial videos, understanding essential lighting techniques is crucial for achieving professional results.

Understanding the Basics of Lighting

To excel in video production, you must first grasp the fundamentals of lighting. The three-point lighting setup, consisting of a key light, fill light, and backlight, forms the foundation of quality video lighting. Moreover, understanding color temperature, measured on the Kelvin scale, is vital. The choice between daylight and tungsten lighting plays a pivotal role in video production.

Natural Lighting Techniques

Harnessing natural light can be a cost-effective way to enhance your video quality. Consider the time of day when shooting, as natural light varies throughout. Window lighting can be advantageous, offering soft and flattering illumination. Diffusing natural light with tools such as diffusers and using reflectors to bounce light onto your subject can yield outstanding results.

Artificial Lighting Techniques

In video production, artificial lighting is often necessary, and there are several types to choose from, including LED lights, tungsten lights, and fluorescent lights. Controlling the intensity of artificial lights is essential; dimmers and diffusion materials can help achieve the desired effect. Properly setting up and positioning artificial lights is crucial to avoid harsh shadows and ensure even illumination.

Lighting for Different Video Styles

The way you light your videos should align with the style you’re aiming to achieve. In interviews and talking head videos, professionalism is key, and avoiding glare on glasses is essential. For narrative filmmaking, lighting sets the mood and atmosphere, and practical lights can add realism. In product videos and commercials, the focus should be on highlighting product features and using accent lighting for impact.

Advanced Lighting Techniques

For those looking to elevate their video production skills, advanced lighting techniques come into play. Understanding the difference between high-key and low-key lighting can help you convey different emotions and atmospheres effectively. Creating depth with lighting involves background lights and the importance of negative fill. Specialty techniques such as silhouetting and colored lighting can add dramatic effects to your videos.

Lighting Accessories and Tools

Having the right lighting accessories and tools can significantly impact your video production. Light stands and mounting options provide stability and precise positioning. Softboxes, umbrellas, and diffusers help control and soften light. Gels and color correction tools are essential for achieving the desired color temperature. C-stands and clamps are indispensable for fine-tuning your lighting setup.

Lighting on a Budget

Budget constraints shouldn’t hinder your ability to achieve quality lighting in video production. You can explore DIY lighting solutions using household lamps and reflective surfaces. Additionally, affordable lighting kits tailored for beginners are available. Weigh the pros and cons of renting vs. buying equipment to make the most cost-effective choice.

Safety Considerations

Ensuring safety on set is paramount. Prevent overheating and fire hazards by using lighting equipment responsibly. Handle electrical equipment with care to avoid accidents. Prioritize the well-being of your cast and crew by creating a safe and comfortable working environment.

Conclusion

In video production, mastering essential lighting techniques is a journey that can lead to remarkable creative growth. The quality of your videos hinges on your ability to harness the power of lighting to convey emotions, set the mood, and capture the viewer’s attention. Whether you’re a novice or an experienced videographer, continuous practice and experimentation with different lighting techniques will undoubtedly elevate your video production skills.

Gift Ideas Galore! How to Use Product Videos to Drive Holiday Sales

The holiday season is synonymous with gift-giving, and businesses can leverage this tradition to boost sales through compelling product videos. Here’s how to create product videos that not only showcase your items but also tap into the holiday shopping excitement.

The Power of Video in Holiday Marketing

Videos are an incredibly effective tool for connecting with customers. They can convey emotion, demonstrate a product’s use, and are easily shareable, which is particularly powerful during the holiday season when people are looking for gift inspiration.

Highlight the Joy of Giving

Craft your product videos around the idea of gifting. Show how your product can bring joy to the recipient, with scenes of people unwrapping gifts and the following happiness. This can create a strong emotional pull towards purchasing.

Create a Festive Atmosphere

Set your product against a backdrop of holiday cheer. Use seasonal decorations, music, and motifs to make the product feel like an essential part of the holiday experience.

Offer Gifting Ideas

Use your video to suggest who might appreciate the product as a gift. Whether it’s tech gadgets for teens, cozy sweaters for grandparents, or toys for pets, guide your customers toward finding the perfect present.

Demonstrate Value

Explain why your product is a must-have for the holidays. Through your video, showcase its features, benefits, and any holiday-specific discounts or bundles that increase its value as a gift.

Use Storytelling

Tell a story that viewers can relate to, perhaps depicting scenarios where your product becomes a solution or adds to the holiday spirit. Stories can be more persuasive than straightforward sales pitches.

Incorporate Customer Reviews

Feature positive customer testimonials in your videos. Hearing from satisfied buyers can be incredibly persuasive, especially if they’re gifting your product to others.

Make it Shareable

Create videos that viewers will want to share with friends and family. A shareable video can increase your reach exponentially during the holiday season.

Use Countdowns to Create Urgency

Incorporate countdowns into your videos as the holidays approach. This taps into the ‘fear of missing out’ (FOMO) and can push customers to purchase before it’s too late. Countdowns can also highlight the last days of special offers or shipping deadlines to ensure gifts arrive on time.

Optimize for Mobile Viewing

Ensure your videos are optimized for mobile viewing, as many customers do their holiday shopping on smartphones and tablets.

Include a Clear Call to Action

Your video should include a clear, compelling call to action. Encourage viewers to buy now, visit your website, or take advantage of a limited-time holiday offer.

Engage Across Multiple Channels

Distribute your product videos across multiple channels, including social media, email newsletters, and your website, to maximize visibility.

Track and Analyze Performance

Use analytics to track the performance of your videos. Understanding viewer engagement can help you tweak your approach and improve future video marketing efforts.

By focusing on these key strategies, businesses can use product videos effectively to drive holiday sales. Videos that resonate emotionally provide value, and offer helpful suggestions will likely engage customers and encourage them to buy.

Drone Videography Mastery: Tips for Stunning Aerial Shots

Drone videography has revolutionized the way we capture stunning visuals from breathtaking heights. Whether you’re a professional filmmaker or an enthusiast looking to up your game, mastering the art of drone videography can open up a world of creative possibilities. In this blog, we’ll explore essential tips and techniques to help you capture stunning aerial shots that will leave your audience in awe.

1. Choose the Right Drone

Selecting the right drone is the foundation of successful aerial videography. Consider factors like camera quality, flight time, and stability. Drones like the DJI Phantom 4 Pro and Mavic Air 2 offer excellent cameras and stability, making them great choices for aerial videography.

2. Understand Your Drone’s Capabilities

Before you take off, familiarize yourself with your drone’s features and settings. Understanding your drone’s capabilities will allow you to maximize its potential. Adjust camera settings like ISO, shutter speed, and white balance to suit your shooting conditions.

3. Plan Your Shots

Aerial videography requires careful planning. Create a shot list and storyboard to visualize your shots in advance. This will help you maximize your flight time and capture the shots you need for your project.

4. Master the Art of Composition

Composition is key to stunning aerial shots. Use the rule of thirds, leading lines, and framing to create visually appealing compositions. Experiment with different angles and perspectives to add depth to your footage.

5. Fly Smoothly

Smooth and controlled flight is essential for capturing stable footage. Practice flying your drone smoothly, and consider using intelligent flight modes like ActiveTrack to assist in tracking moving subjects smoothly.

6. Use ND Filters

Neutral density (ND) filters reduce the light entering the camera, allowing you to achieve the desired shutter speed. They are crucial for maintaining motion blur and achieving cinematic shots, especially in bright conditions.

7. Time of Day Matters

The golden hours—early morning and late afternoon—offer soft, warm light that can enhance the beauty of your aerial shots. Avoid shooting in harsh midday sun whenever possible.

8. Pay Attention to Weather Conditions

Keep an eye on the weather forecast before you fly. Wind, rain, and extreme temperatures can affect your drone’s performance and safety. Always prioritize safety when planning your flights.

9. Edit and Color Grade

Post-production is where your footage truly comes to life. Use video editing software to stabilize shaky footage, color grade to enhance the mood, and add music or sound effects to create a captivating final product.

10. Respect Regulations and Privacy

Ensure you are aware of and adhere to local drone regulations. Respect people’s privacy and avoid flying over restricted areas or private property without permission.

Incorporating these tips into your drone videography endeavors will undoubtedly enhance your skills and elevate your aerial shots to a whole new level of stunning. Remember, practice makes perfect, so keep honing your skills, and soon you’ll be capturing cinematic masterpieces from the sky.

5 Ways to Improve Your Video Editing Skills

Video editing is a blend of art and technology. Whether you’re an aspiring filmmaker, a content creator, or just someone looking to make home videos more appealing, honing your video editing skills is essential. Here are five strategies to help you elevate your video editing prowess.

1. Learn the Basics Thoroughly

Before diving deep into advanced techniques, it’s crucial to have a firm grasp of the basics.

Understand Your Software

Whichever editing software you choose – be it Adobe Premiere Pro, Final Cut Pro, or DaVinci Resolve – invest time in understanding its interface, tools, and features.

Master Cuts and Transitions

Learn the different types of cuts and transitions. From jump cuts to match cuts, knowing when and how to use them will significantly improve the flow of your videos.

2. Watch and Analyze

One of the best ways to learn is by watching and dissecting quality content.

Study Professional Edits

Choose a few of your favorite movies or videos and watch them critically. Pay attention to transitions, pacing, and how the story unfolds through editing.

Join Online Forums and Groups

Platforms like Reddit and Facebook have numerous video editing communities. Engaging in these groups allows you to share your work, get feedback, and view others’ edits, offering fresh perspectives and techniques.

3. Constantly Practice

Like any skill, video editing improves with consistent practice.

Start Personal Projects

Don’t wait for a client or a significant project. Start editing any footage you have – family gatherings, vacations, or even random clips. The goal is to practice and experiment.

Participate in Challenges

Many online platforms host monthly or weekly video editing challenges. Participating in these will improve your skills and expand your portfolio and network.

4. Stay Updated with Trends and Technology

The world of video editing is continually evolving. Staying updated is key to ensuring your edits don’t become outdated.

Enroll in Courses

Platforms like Udemy, Coursera, and Skillshare regularly offer courses on the latest video editing techniques and software updates.

Attend Workshops and Webinars

Many industry professionals host workshops and webinars. These sessions provide insights into new tools, trends, and techniques in video editing.

5. Seek Feedback and Collaborate

Working in isolation can sometimes limit growth. Collaboration and feedback are vital.

Join a Video Editing Club

Whether it’s in your locality or online, joining a club or group of video editors can provide a platform for collaboration, feedback, and shared learning.

Work on Collaborative Projects

Team up for projects if you have friends or colleagues in the filmmaking industry. Working with a team exposes you to different editing styles and techniques, broadening your horizons.

Conclusion

Improving your video editing skills is a continuous journey of learning, practicing, and staying updated. By mastering the basics, critically analyzing professional work, practicing regularly, staying abreast of the latest trends, and seeking feedback and collaboration, you’ll be well on your way to becoming a proficient video editor. Remember, every great editor starts with a single clip, so no matter where you are on your journey, you can achieve video editing excellence with dedication and passion.

Don’t Attend a Christmas Light Show Without These 6 Essential Items!

As the holiday season approaches, one of the most enchanting ways to revel in the festive spirit is by attending a mesmerizing Christmas light show in Ulster Park, NY. The dazzling lights, intricate displays, and joyous atmosphere create a truly magical experience for individuals and families alike. However, to make the most of this unforgettable outing, it’s imperative to come prepared. Explore the six indispensable items you should only leave home with when venturing to a captivating light show.

1. Warm Clothing and Layers

There’s no denying the whim of a Christmas light show, but the crisp winter air can sometimes catch you off guard. To ensure you stay snug and stylish, dress in warm layers. A well-insulated coat, gloves, a cozy scarf, and a snug hat can protect you from the cold and add a touch of seasonal flair to your ensemble. Remember, layering allows you to adjust your clothing as the temperature changes throughout the evening, ensuring you stay comfortable without compromising style.

2. Comfortable Footwear

Navigating through the intricate light displays often involves quite a bit of walking. Opt for comfortable footwear to ensure you can explore every corner without any discomfort. Sturdy boots or shoes with good support protect your feet from the elements and provide the necessary comfort for a leisurely stroll through the enchanting landscapes of the light show.

3. Portable Phone Charger

In a world where every moment is worthy of a snapshot, attending a Christmas light show without a fully charged phone is a missed opportunity. Carry a portable phone charger to capture the awe-inspiring beauty of the displays and share them with friends and family. This handy accessory guarantees your phone remains juiced throughout the event, allowing you to capture and share breathtaking visuals without interruption.

4. Cash and Cards

Although online ticketing is prevalent, carrying some cash is a good idea when you go to a light show in Ulster Park, NY. Some vendors might only take cash for delicious hot cocoa, tempting treats, and delightful souvenirs. Also, make sure to have your debit or credit card ready in case of unplanned expenses or emergencies. This smart financial planning ensures you can truly enjoy all the delicious offerings and wonderful keepsakes the event offers.

5. Reusable Water Bottles and Snacks

Exploring a mesmerizing light show can be as refreshing as it is enchanting. To keep your energy levels up and stay refreshed, carry a reusable water bottle to stay hydrated throughout the event. A handful of light snacks like granola bars or trail mix can also go a long way in maintaining your vitality as you traverse the luminous wonderland.

6. Blanket or Folding Chair

If the light show in Ulster Park, NY, features open spaces or areas for relaxation, consider bringing a compact blanket or folding chair. Having a cozy spot to rest, enjoy a quick snack, or soak in the enchanting ambiance can add more comfort to your experience. This thoughtful addition ensures you have your personal oasis amidst the dazzling lights.

Experience the Holiday Magic This Christmas!

Discover the enchanting magic of the holiday season at A Frosty Fest, a mesmerizing Christmas light show in Ulster Park, NY, to be noticed. Get ready to dive into the festive atmosphere and make timeless memories. Remember to bring these six must-have items, as with these essentials in tow, you’re all set for an extraordinary journey. Immerse yourself in the radiant spectacle, fully prepared to bask in the seasonal enchantment as you wander through captivating exhibits and craft everlasting moments of delight. Don’t miss out—let the holiday wonder unfold!

A Frosty Fest

778 Broadway, Rte 9W, Ulster Park, NY 12487, United States

Phone Number: +18453392666

https://www.afrostyfest.com/tickets

Don’t Press Record Without Reading This: Essential Video Production Checklist!

In content creation, video has emerged as a powerful tool for communication and engagement. Whether you’re a seasoned videographer or a budding content creator, one thing remains constant: a well-executed video requires meticulous planning. To ensure your next video project goes off without a hitch, here’s a comprehensive video production checklist that covers all the crucial bases.

1. Pre-Production

A solid foundation is key to a successful video shoot. Begin by clarifying your goals, target audience, and the message you want to convey. Scriptwriting and storyboarding come next, helping you visualize the narrative flow. Consider aspects like location scouting and talent selection at this stage to ensure a clear roadmap for your shoot.

2. Equipment Readiness

Equip yourself with the right tools to capture your vision effectively. Ensure your cameras, lenses, microphones, and lighting equipment are in optimal working condition. A crucial detail often overlooked is battery charging. Imagine being all set for a perfect shot only to have your equipment run out of power.

3. Location Preparation

Your location can significantly influence your video’s mood and message. For indoor shoots, assess lighting conditions and acoustics. When filming outdoors, consider factors like natural light availability and ambient noise. If your shoot involves public spaces, ensure you have the necessary permits.

4. Shot List and Storyboarding

A well-organized shoot requires meticulous planning of each shot. Create a shot list outlining the sequence of shots you need. Storyboarding, with its visual representation of scenes, helps you communicate your vision to your team. It’s a roadmap that keeps your shoot on track, ensuring no essential shots are missed.

5. Lighting and Audio Setup

Lighting and audio quality can make or break your video. Leverage natural light when possible and supplement with artificial lighting as needed. Adequate lighting enhances visual appeal and ensures your subject is well-lit. Similarly, prioritize audio clarity by positioning microphones correctly and minimizing background noise.

6. Camera Settings and Framing

Your camera settings directly impact the visual quality of your video. Adjust resolution, frame rate, and white balance according to your project’s needs. Framing is equally vital—adhere to the rule of thirds to create balanced compositions and draw viewers’ attention to key elements.

7. Talent Direction

If your video involves on-screen talent, effective communication is crucial. Offer clear direction to ensure performances feel authentic and genuine. Comfortable talent leads to natural expressions that resonate with your audience.

8. Continuity and Coverage

Think ahead to the editing process while shooting. Capture cutaways, reaction shots, and B-roll to enhance storytelling in post-production. This ensures a seamless flow and allows you to smoothly transition between shots during editing.

9. Audio Monitoring

Be aware of audio monitoring while filming. Use headphones to identify any audio issues like distortion or background noise. Real-time monitoring prevents unwelcome surprises in the editing room.

10. Post-Production Readiness

After capturing your footage, you’re ready to dive into the post-production phase. Organize your footage and create backups to safeguard your work. Consider creating a rough edit based on your shot list—this initial edit will save time when fine-tuning your final product.

11. Review and Evaluation

Before you wrap up, review your footage for any missed shots or technical glitches. Seeking feedback from your team can provide valuable perspectives and highlight areas for improvement.

12. Backup and Storage

Your footage is invaluable—ensure it’s secure by creating multiple backups. External hard drives and cloud storage protect against data loss, providing peace of mind for your hard work.

Conclusion

A successful video production relies on careful planning and meticulous execution. This comprehensive video production checklist serves as your blueprint, confidently guiding you from pre-production to post-production. Addressing each aspect of the checklist sets the stage for a visually stunning and compelling video that captivates your audience and delivers your message effectively.

Let the Chase Begin! 5 Terrifying Encounters in a Serial Killer Haunted House

In the eerie realm of horror attractions, few themes evoke a sense of dread and fascination quite like the twisted world of serial killers. As you prepare to step into the chilling embrace of the scariest haunted house in Ulster Park, NY, be prepared to confront your darkest fears and navigate a labyrinth of terror. From bone-chilling encounters to heart-pounding suspense, the horrors that await will test your resolve and leave an indelible mark on your psyche. Join us as we unveil five spine-tingling experiences that will immerse you in the nightmarish world of serial killers.

1. The Hunter’s Lair 

Venture deep into the lair of a deranged killer, where the scent of fear hangs heavy in the air. As you navigate dimly lit corridors and blood-splattered rooms, the unnerving presence of the hunter will keep you on edge. Every shadow could hide a lurking threat, and every step forward is a step closer to danger.

2. The Torture Chamber 

Confront the horrifying aftermath of the killer’s sadistic tendencies in the torture chamber. Disturbing scenes of torment and suffering surround you, each one a testament to the depths of human depravity. The chilling realism of the room makes it difficult to distinguish reality from illusion, intensifying the terror of the experience.

3. The Cat-and-Mouse Pursuit 

Feel the adrenaline surge as you become the prey in a deadly cat-and-mouse pursuit. The killer’s presence grows stronger with every twist and turn, and the stakes become higher. Your heart races as you try to outsmart your pursuer and escape the relentless pursuit.

4. The Sinister Backstory 

Peel back the layers of darkness and uncover the chilling backstory of the serial killer. You’ll gain insight into the twisted psyche that drives their heinous acts through haunting audiovisuals and immersive storytelling. The narrative unfolds like a sinister puzzle, leaving you haunted by the disturbing revelations.

5. The Final Confrontation 

Prepare for a heart-stopping showdown in the final confrontation with the serial killer. As you enter their lair one last time, the tension reaches a fever pitch and the lines between reality and nightmare blur. The climactic encounter will leave you breathless and trembling, questioning your ability to survive.

Conclusion

The scariest haunted house in Ulster Park, NY, offers a spine-chilling experience that plunges you into the depths of human darkness. From the hunter’s lair to the final confrontation, each encounter is designed to test your courage and push the boundaries of fear. As you navigate the twisted narrative and heart-pounding suspense, remember that every scream, every gasp, and every racing heartbeat is a testament to the immersive terror that awaits.

Visit the Scariest Haunted House in Ulster Park, NY!

Prepare for an electrifying adventure unlike any other at Ulster Park’s top haunted venue. Delve into the spine-tingling realm of the scariest haunted house in Ulster Park, NY, where each twist and turn reveals a fresh terror, and every move propels you further into the unknown.

Do you have the courage to confront the horrors that await? Don’t miss your chance to obtain your tickets and join the pulse-pounding tradition at Headless Horseman Hayrides and Haunted Attractions.

Headless Horseman Hayrides and Haunted Attractions

778 Broadway, Rte 9W, Ulster Park, NY 12487, United States

Phone Number: +18453392666

https://headlesshorseman.com/